
Home Electronics Laboratory: Create Your Ideal DIY Space
Are you looking to dive into the exciting world of electronics but unsure where to start? A home electronics laboratory can be your gateway to innovation and creativity. With the proliferation of DIY electronics projects, setting up your own lab allows you to learn valuable skills, experiment with circuits, and bring your ideas to life. In this comprehensive guide, we will explore the essential components needed for a successful home electronics laboratory, as well as tips on organization and safety. By the end of this article, you’ll be equipped with the knowledge to create a workspace that fosters experimentation and learning in the realm of home electronics.
Understanding the Concept of a Home Electronics Laboratory
A home electronics laboratory is a dedicated space where enthusiasts and professionals can experiment, build, and repair electronic devices. The rise of DIY culture and accessibility of components has made it increasingly popular. A well-equipped lab allows individuals to engage in hands-on learning, fostering creativity and technical skills. Such labs can range from simple desks with basic tools to fully equipped workshops with advanced equipment. Setting up a home electronics lab encourages problem-solving and innovation, making it an enriching experience for both beginners and seasoned hobbyists.
Key Components of a Home Electronics Lab
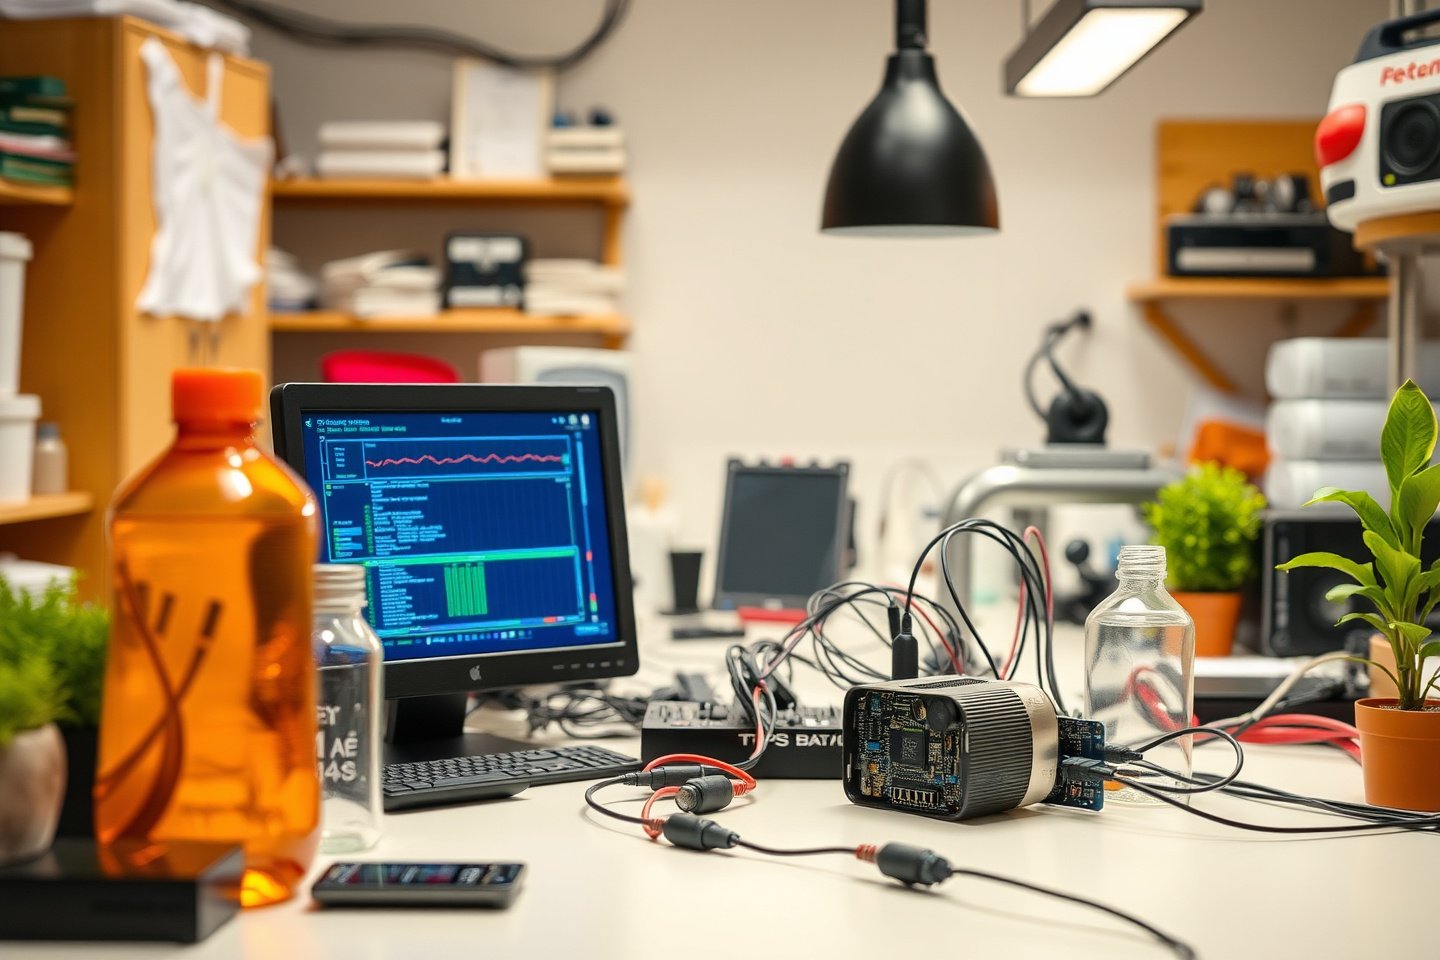
Essential components of a home electronics laboratory include tools, equipment, and materials. Basic tools like soldering irons, multimeters, and wire strippers are crucial for hands-on tasks. Additionally, equipment such as oscilloscopes and power supplies enhance experimentation capabilities. A variety of electronic components, like resistors, capacitors, and microcontrollers, should also be on hand to facilitate different projects.
Importance of Safety in Electronics Work
Safety is paramount in any electronics lab. Understanding electrical safety, including the proper handling of tools and components, can prevent accidents. Users should familiarize themselves with safe practices like wearing protective eyewear, working in well-ventilated areas, and ensuring workspaces are free from clutter. By prioritizing safety, individuals can focus on their projects without undue risk.
Key Points:
- A home electronics lab encourages hands-on learning and creativity.
- Safety practices are essential for a productive and secure working environment.
Setting Up Your Home Electronics Laboratory
Creating a home electronics laboratory involves careful planning and organization. Start by selecting an appropriate space that is well-lit and has adequate power supply. Consider the layout to optimize workflow, placing frequently used tools within easy reach. Investing in storage solutions, such as bins and shelves, will keep components organized and accessible. This setup not only enhances efficiency but also creates an inviting environment for exploration and creativity in electronics.
Choosing the Right Location
Selecting the right location for your electronics lab is crucial. Look for a quiet, well-ventilated area with access to power outlets. Ideally, the space should be away from high traffic areas to minimize distractions. A dedicated room or a corner of your garage can be ideal, allowing you to focus on projects without interruptions.
Essential Tools and Equipment for Beginners
For beginners, a few essential tools can make a significant difference. Basic tools include a soldering iron, multimeter, and wire cutters. A breadboard is also invaluable for prototyping circuits without soldering. As your skills grow, you can gradually invest in more advanced tools like oscilloscopes and function generators, enhancing your ability to tackle complex projects.
Key Points:
- Choose a quiet, dedicated space for your electronics lab.
- Start with essential tools and gradually expand your equipment as you gain experience.
Setting Up Your Home Electronics Laboratory
Creating a home electronics laboratory requires careful planning and organization. Start by designating a specific area in your home that is well-ventilated and has sufficient power outlets. Ensure that the space is clutter-free to facilitate a productive work environment. Invest in a sturdy workbench that can accommodate your projects and tools. Additionally, consider implementing proper lighting to reduce eye strain, especially during intricate tasks. Organize your tools and components in labeled containers for easy access and inventory management.
Essential Tools and Equipment
A well-equipped electronics lab should include essential tools such as a multimeter, soldering iron, and oscilloscope. Each tool serves a specific purpose: the multimeter helps in measuring voltage, current, and resistance, while the soldering iron is crucial for assembling circuits. An oscilloscope allows you to visualize electrical signals, which is essential for troubleshooting. Start with the basics and gradually expand your toolset as your projects become more complex.
Safety Considerations
Safety is paramount in a home electronics laboratory. Always wear safety goggles when working with soldering and sharp objects. Ensure that your workspace is free of flammable materials, and keep a fire extinguisher nearby. Familiarize yourself with electrical safety protocols, such as working with low-voltage circuits before advancing to higher voltages. Properly disconnect power sources before making adjustments to your projects to prevent accidents.
Key Points:
- Designate a clutter-free space with good lighting for your lab.
- Prioritize safety by wearing protective gear and following electrical protocols.
💡 Ensure proper ventilation in your lab to avoid inhaling fumes from soldering.
💡 Use anti-static mats to protect sensitive components from static electricity.
Advanced Projects for Your Home Electronics Laboratory
Once your home electronics laboratory is set up, you can embark on advanced projects that enhance your skills and knowledge. Start with building custom circuits, which can improve your understanding of electronics fundamentals. Advanced projects may include creating microcontroller-based systems, like home automation or robotics. These projects often require programming skills in addition to circuit design, providing a comprehensive learning experience. Document your projects to track your progress and share your findings with the community.
Microcontroller Programming
Microcontrollers are at the heart of many electronics projects. Learning programming languages such as C or Python can significantly expand your capabilities. Begin with simple tasks, like blinking an LED, and gradually progress to more complex projects involving sensors and actuators. There are numerous online resources and communities where you can share your code and troubleshoot issues with fellow enthusiasts.
Prototyping and Testing
Prototyping is crucial when developing new electronic devices. Use breadboards for initial circuit designs, allowing for easy modifications. Once you have a working prototype, testing is essential to ensure functionality and safety. Utilize tools like oscilloscopes and logic analyzers to diagnose issues in your circuits. Document your testing procedures and results for future reference and improvement.
Key Points:
- Engage in microcontroller programming to enhance project complexity.
- Utilize prototyping tools to experiment and refine your electronic designs.
💡 Start small with microcontroller projects to build confidence and skills.
💡 Regularly test and document your prototypes to streamline future developments.
EXPERT TIPS Pro Advice
Keep Learning
Continual learning through online courses and tutorials keeps your skills current and exposes you to new techniques and technologies in electronics.
Join Electronics Communities
Participating in forums or local maker spaces fosters collaboration and can provide invaluable feedback on your projects.
Document Your Work
Keeping a detailed record of your projects, including challenges and solutions, helps in troubleshooting and can guide future projects.
Frequently Asked Questions
Conclusion
Establishing a home electronics laboratory offers a unique opportunity to explore the world of electronics. By setting up a well-equipped space, utilizing essential tools, and gradually advancing your skills, you can engage in rewarding projects that foster creativity and knowledge.
🎯 Key Takeaways:
- A home electronics laboratory is a space for experimentation.
- Essential tools include soldering equipment and multimeters.
- Beginners can start with simple projects to build confidence.
- Regular practice and community engagement enhance skills.
- Focusing on specific projects helps deepen expertise.
Expert Advice: Embrace experimentation and curiosity in your home electronics laboratory. Don’t hesitate to make mistakes, as they are valuable learning experiences. Continuously seek out new knowledge and challenges to grow your skills and understanding of electronics.
Consider starting your own home electronics laboratory today and unleash your creativity with hands-on projects!
Leave a Reply