
How to Make Electronic Gadgets at Home: A Simple Guide
Have you ever wondered how to make electronic gadgets at home? With the rise of DIY culture and technology accessibility, building your own gadgets is more feasible than ever. According to a recent study, over 70% of hobbyists express interest in creating their own electronic devices, yet many feel intimidated by complex circuits and components. In this article, we will leverage our expertise in electronics and DIY projects to guide you through the process of crafting your own gadgets. You will learn essential techniques, tools needed, and common pitfalls to avoid, empowering you to unleash your creativity and innovation in the world of home electronics.
Understanding the Basics of Electronic Gadgets
Before diving into creating electronic gadgets at home, it’s essential to understand the foundational principles of electronics. Basic concepts such as voltage, current, and resistance form the backbone of any electronic project. Familiarity with circuits, components, and how they interact can significantly impact your ability to successfully build gadgets. Learning about Ohm’s Law, which relates voltage, current, and resistance, is crucial for troubleshooting and optimizing your designs. Additionally, a grasp of series and parallel circuits will help you determine how to connect components in your projects effectively.
Essential Components
Common components such as resistors, capacitors, diodes, and transistors are the building blocks of any electronic gadget. Understanding each component’s function allows you to choose the right parts for your projects. For instance, resistors limit current flow, while capacitors store energy temporarily. Familiarize yourself with these components through hands-on practice, as this will deepen your comprehension and prepare you for more complex builds.
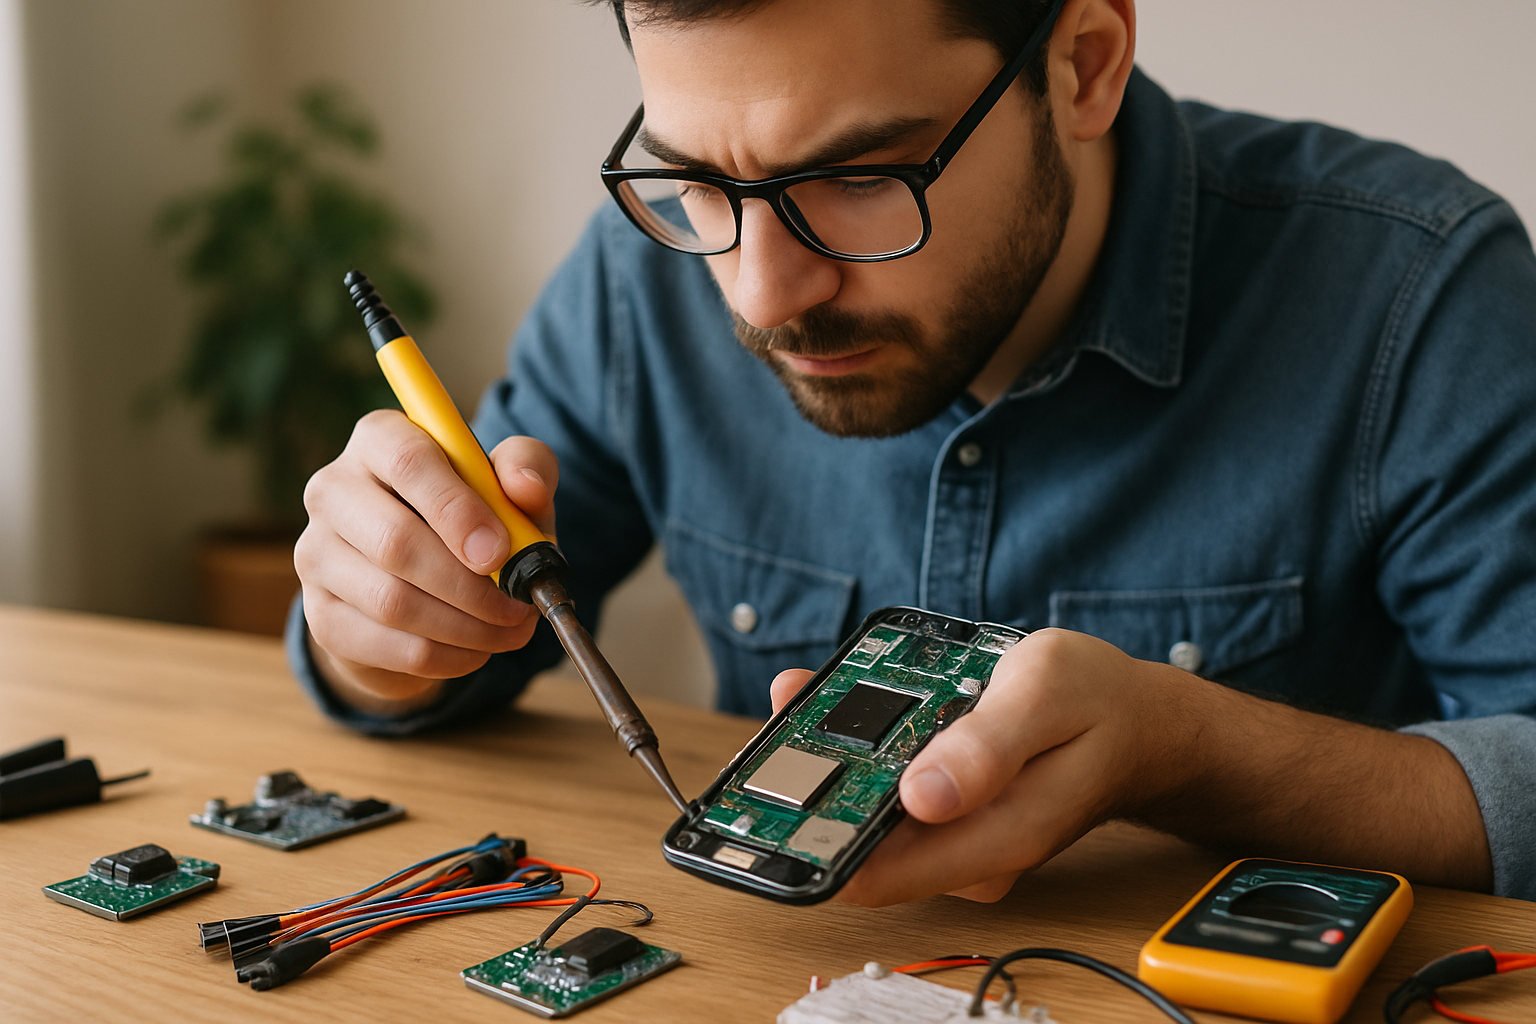
Basic Tools for Electronics
Having the right tools is vital for successful gadget creation. Basic tools include a soldering iron, multimeter, breadboard, and wire strippers. A soldering iron is essential for permanent connections, while a multimeter helps you measure voltage, current, and resistance. A breadboard allows for easy prototyping without soldering, enabling you to test designs quickly. Investing time in learning how to use these tools will enhance your efficiency and accuracy.
Key Points:
- Grasping foundational principles is crucial for successful projects
- Familiarity with components and tools enhances building skills
Getting Started with Simple Projects
Once you have a basic understanding of electronics, the next step is to start with simple projects. Beginning with straightforward gadgets can help you build confidence and skills. Projects like a homemade flashlight, simple light sensor, or a mini speaker can serve as excellent starting points. Each project will teach you how to apply theoretical knowledge practically, reinforcing your learning. As you progress, you can gradually introduce more complexity, allowing for continuous growth in your skills and understanding of electronics.
Building a Simple Circuit
Start with a basic circuit, such as an LED light connected to a power source. Use a breadboard to arrange the components without soldering. This hands-on experience will help you understand circuit connections and how electricity flows. Experiment with adding resistors to control brightness, which reinforces the concepts of resistance and current.
Troubleshooting Common Issues
When working on electronic projects, troubleshooting is an inevitable part of the process. Common problems include poor connections, incorrect component placement, and insufficient power supply. Learn to use your multimeter to identify issues, and don’t hesitate to revisit your circuit layouts to ensure everything is as it should be. Developing problem-solving skills is essential in electronics.
Key Points:
- Start with simple projects to build confidence
- Troubleshooting skills are crucial for successful builds
Understanding Basic Electronics Principles
Before diving into creating electronic gadgets at home, it’s crucial to grasp some fundamental principles of electronics. This includes an understanding of voltage, current, and resistance, often encapsulated in Ohm’s Law. Equip yourself with knowledge about circuits, components like resistors, capacitors, and diodes, and how they interact. Familiarize yourself with schematic diagrams as they represent the connections between components. A solid foundation will enable you to troubleshoot and innovate effectively, making it easier to create more complex gadgets as your skills progress.
Ohm’s Law Explained
Ohm’s Law is the cornerstone of electronics, stating that Voltage (V) = Current (I) x Resistance (R). Understanding this relationship helps you predict how components will behave in a circuit. For instance, if you know the voltage and resistance, you can calculate the current flowing through your circuit. This knowledge is essential when designing gadgets to ensure they operate safely and effectively.
Components and Their Functions
Familiarize yourself with common electronic components. Resistors limit current, capacitors store energy, and diodes allow current to flow in one direction. Understanding how each component functions and interacts within a circuit will empower you to design and modify your projects. Start with simple circuits and gradually introduce more components as you gain confidence.
Key Points:
- Understanding Ohm’s Law is essential for circuit design.
- Familiarity with components is key to effective gadget creation.
💡 Always start with a schematic to plan your circuit layout.
💡 Use a multimeter to check connections and component functionality.
💡 Experiment with different component values to see their effects on the circuit.
Practical Steps to Create Your First Gadget
Creating your first electronic gadget can be an exciting venture. Start with a simple project, such as a LED circuit or a basic alarm system. Gather your components and tools, including a breadboard for easy assembly. Follow a reliable guide or tutorial, which can help demystify the process. Once assembled, test your gadget systematically. If it doesn’t work, troubleshoot by checking connections, component placement, and power supply. This hands-on experience is invaluable for learning and will boost your confidence for future projects.
Choosing Your First Project
Select a simple project that aligns with your skill level. A blinking LED circuit is a classic starter project that requires only a few components and helps you understand basic circuit assembly. As you gain confidence, consider projects like a mini weather station or a simple robot, which can incorporate more complex components and functionalities.
Assembling and Testing Your Gadget
Begin with a breadboard to assemble your components without soldering. This allows for easy adjustments. Once your circuit is complete, power it up and observe its functionality. If issues arise, systematically check each component and connection. Learning to troubleshoot effectively will enhance your understanding and skills, enabling you to tackle more complex projects in the future.
Key Points:
- Start with simple projects to build confidence.
- Document your process to improve future attempts.
💡 Use a breadboard for easy prototyping before soldering components together.
💡 Document your process to learn from mistakes and successes.
💡 Join online communities for troubleshooting and project ideas.
EXPERT TIPS Pro Advice
Experiment with different circuit designs.
Trying variations in your designs will enhance your understanding of how components interact and improve your problem-solving skills.
Keep a well-organized workspace.
An organized workspace reduces distractions, minimizes mistakes, and allows for a smoother workflow, essential when working on intricate projects.
Learn to read circuit diagrams.
Understanding circuit diagrams is crucial for building gadgets accurately and troubleshooting issues, as they provide a clear blueprint of your project.
Document your projects and outcomes.
Keeping a record of your projects helps you track progress, understand failures, and replicate successes in future endeavors.
Stay curious and keep learning.
The field of electronics is vast and constantly evolving. Embrace new ideas and technologies to stay ahead and enhance your gadget-making skills.
Frequently Asked Questions
Conclusion
Making electronic gadgets at home is an enriching experience that enhances your technical skills and creativity. Start with simple projects, utilize recycled materials, and prioritize safety. Embrace the learning process as you explore the exciting world of DIY electronics.
🎯 Key Takeaways:
- Begin with simple projects to build confidence.
- Use recycled materials to promote sustainability.
- Prioritize safety when working with electronic components.
- Learning programming can enhance your projects.
- Patience and practice are essential for skill development.
Expert Advice: Embrace the challenges of DIY electronics as opportunities for learning. Experiment with different projects, stay curious, and don’t hesitate to seek advice from online communities or tutorials to enhance your skills.
Start your first project today and explore the fascinating world of home electronics!
Leave a Reply