
How to Use Arduino for Home Security Systems: A Comprehensive Guide
Are you concerned about the safety of your home and looking for an affordable solution? With the rise in DIY technology, many homeowners are turning to Arduino for home security systems. This versatile platform allows you to create custom security solutions tailored to your unique needs. In this article, we will explore how to use Arduino for home security systems, providing step-by-step guidance and crucial insights. With over 15 years of experience in the field, we will equip you with the knowledge necessary to build effective, reliable systems that enhance your home’s safety. By the end of this guide, you will understand the fundamental components, best practices, and advanced techniques to implement your very own Arduino-based home security system.
Understanding Arduino and Its Role in Home Security
Arduino is an open-source electronics platform that enables users to create interactive objects or environments. Its versatility makes it an ideal choice for DIY home security systems. By combining sensors, actuators, and a microcontroller, users can build a tailored security system that meets their specific needs. Arduino’s ability to process inputs from various sensors allows for effective monitoring and protection of one’s home. Moreover, its user-friendly programming language makes it accessible for both beginners and experienced developers, enhancing its popularity in home automation projects.
What is Arduino?
Arduino consists of a microcontroller, software, and a community that supports users in building projects. The microcontroller can read input from various sensors (like motion detectors and door sensors) and control output devices (such as alarms and cameras). The platform’s simplicity allows users to create complex systems with minimal programming knowledge.
Advantages of Using Arduino for Security Systems
One primary advantage of using Arduino for home security is cost-effectiveness. Unlike commercial systems, Arduino projects can be assembled with affordable components. Additionally, the flexibility of Arduino allows for customization, enabling users to design systems that specifically cater to their security needs, such as integrating home automation features.
Key Points:
- Arduino is an open-source platform ideal for DIY projects.
- Customization and cost-effectiveness are key benefits of using Arduino.
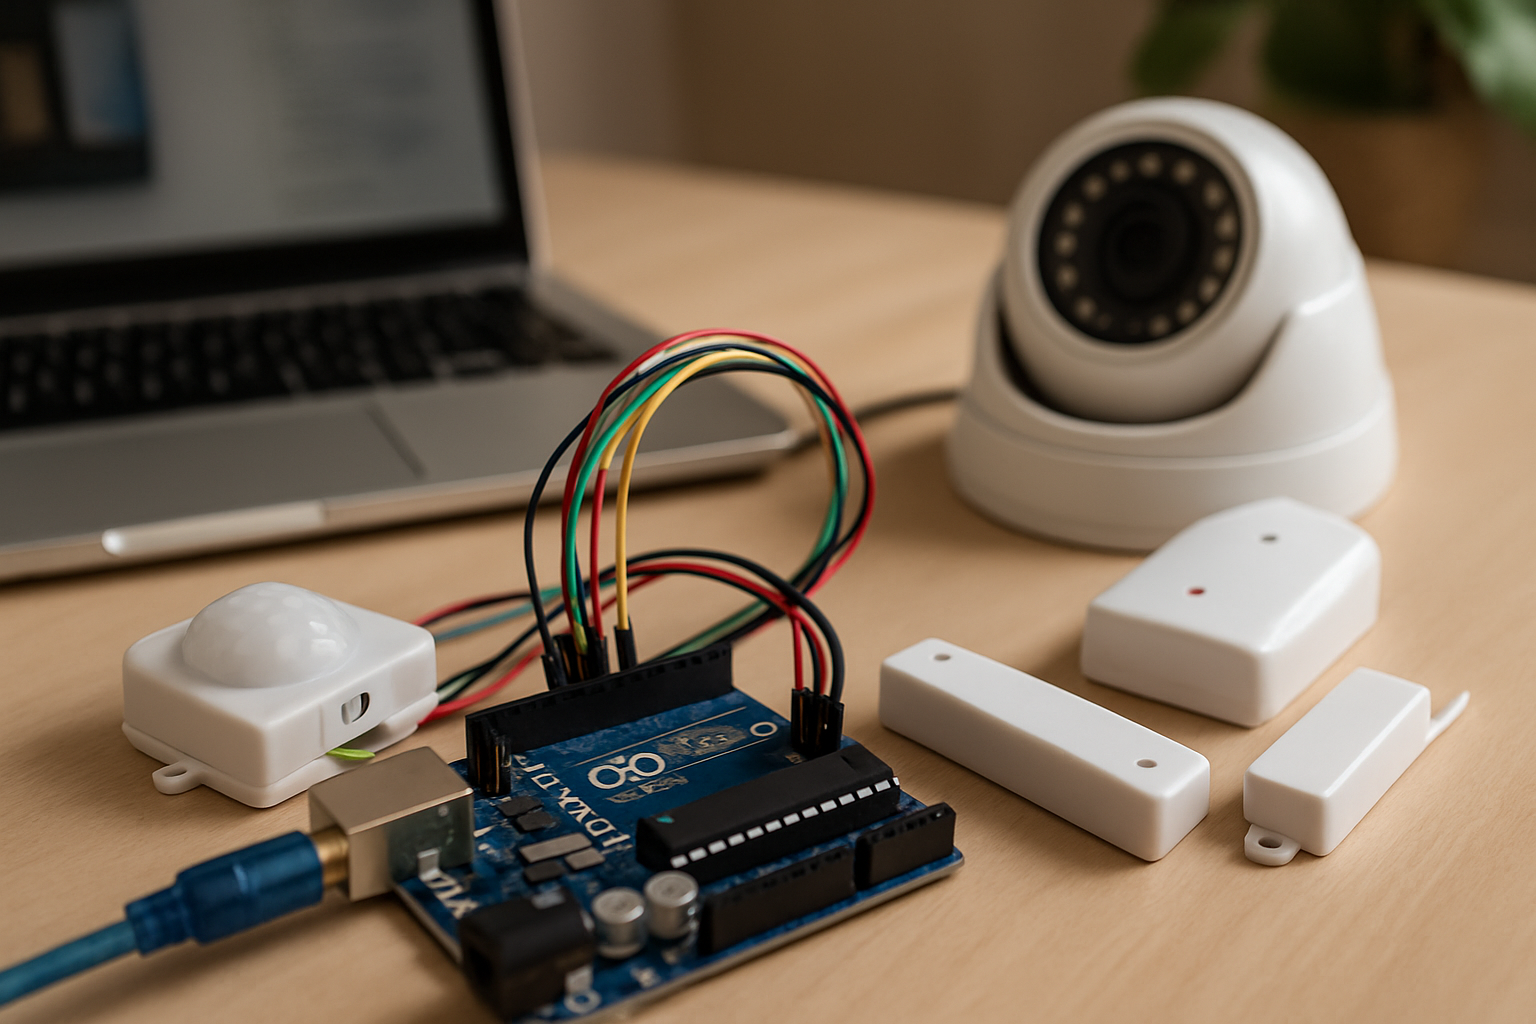
Essential Components for Arduino-Based Security Systems
Building a home security system with Arduino requires several essential components. The combination of sensors, actuators, and communication modules forms the backbone of the system. Understanding these components and their functions is crucial for creating an effective security solution. By selecting the right components, users can design a system that not only detects intrusions but also alerts homeowners in real-time.
Key Sensors for Detection
Common sensors used in Arduino-based security systems include PIR motion sensors, door and window contact sensors, and smoke detectors. These sensors help detect unauthorized access or environmental hazards. When integrated with Arduino, these sensors can trigger alarms or send notifications to mobile devices, enhancing security measures.
Actuators and Alarms
Actuators, such as buzzers or sirens, are essential for alerting homeowners when a security breach occurs. By programming Arduino to activate these devices in response to sensor signals, users can create a responsive security system. Additionally, visual indicators like LEDs can also be included to signal system status.
Communication Modules for Remote Monitoring
Integrating communication modules like Wi-Fi or Bluetooth allows for remote monitoring of the security system. This feature enables homeowners to receive alerts on their smartphones and even control the system remotely. By utilizing platforms like IFTTT, users can automate responses based on specific triggers, further enhancing home security.
Key Points:
- Understanding essential components is vital for system effectiveness.
- Sensors, actuators, and communication modules form the core of an Arduino security system.
Setting Up Your Arduino for Home Security
To effectively use Arduino for home security systems, it begins with a solid setup. Start by selecting the right Arduino board that suits your project’s needs, such as the Arduino Uno for beginner projects or the Arduino Mega for more complex systems. Ensure you have essential components like sensors, cameras, and alarms ready for integration. The next step is to create a schematic that outlines how each component connects to the Arduino. This includes wiring the sensors to the input pins and the alarms to the output pins. Lastly, use the Arduino IDE to write a basic script that will allow the board to interact with the sensors and react accordingly. A straightforward approach is to program it to trigger an alarm if motion is detected or if a door is opened unexpectedly.
Choosing the Right Components
Selecting the appropriate components is crucial for a successful home security system. Start with motion sensors, which can detect movement and alert you of potential intrusions. Consider door and window sensors that activate when openings occur. Cameras can be added for visual monitoring, and alarm systems can provide an audible alert. Ensure that all components are compatible with your Arduino board to avoid technical issues.
Wiring and Schematic Design
Creating a detailed schematic is vital for connecting your components efficiently. Use online tools or software to design the layout, ensuring that each sensor is wired to the correct pin on the Arduino. Pay attention to power requirements and ground connections to avoid circuit failures. Clear labeling of wires and connections will help during troubleshooting and future upgrades.
Key Points:
- A well-planned setup facilitates troubleshooting.
- Begin with basic features to ensure a functional system.
💡 Start simple; build basic functionalities before adding complexity.
💡 Document your setup and code to simplify future modifications.
Programming Your Arduino for Security Functions
Programming your Arduino to facilitate security functions is where the magic happens. Use the Arduino IDE to write code that listens for inputs from your sensors and triggers responses accordingly. For instance, you can set up an interrupt service routine that detects when a motion sensor is activated and sends a signal to an alarm. Additionally, consider implementing a time delay feature that allows for a brief pause before the alarm is triggered, giving family members a chance to deactivate it. Incorporate notifications, such as sending alerts to your phone via Wi-Fi or GSM modules, to keep you informed even when you are away from home. It’s crucial to test your code thoroughly to ensure that all components respond as intended and to refine the logic based on real-world scenarios.
Basic Coding Techniques
When starting with Arduino programming for security systems, familiarize yourself with basic coding techniques. Learn how to use conditional statements to control actions based on sensor inputs. For example, if a motion sensor detects movement, the Arduino should execute a command to trigger the alarm. Utilize functions to organize your code, making it easier to manage and troubleshoot. Start with simple scripts and gradually add complexity as you gain confidence.
Incorporating Notifications
Adding notification features is a significant enhancement to your Arduino home security system. Use Wi-Fi or GSM modules to send alerts directly to your phone or email when an alarm is triggered. This setup requires additional coding but greatly increases the effectiveness of your security system. Consider implementing a user interface that allows you to customize notification settings, so you can decide how and when to receive alerts.
Key Points:
- Thorough testing ensures reliability and performance.
- Documentation aids in future upgrades and troubleshooting.
💡 Debugging is essential; test your code in stages to identify issues.
💡 Always back up your code and documentation to prevent data loss.
EXPERT TIPS Pro Advice
Use modular design principles
Design your security system in modules to allow for easy upgrades and testing of individual components without affecting the entire system.
Implement redundancy
Incorporate backup systems, like secondary sensors or alarms, to ensure your security system remains functional in case of component failure.
Stay updated with security protocols
Regularly check for updates or new libraries that enhance the security features of your Arduino system, as technology evolves quickly.
Frequently Asked Questions
Conclusion
Using Arduino for home security systems allows for a highly customizable and interactive approach. By integrating various sensors, alarms, and cameras, you can create a tailored security solution. This flexibility empowers you to adapt your system as your security needs change over time.
🎯 Key Takeaways:
- Arduino enables customization for home security.
- Motion detection can be easily implemented.
- Cameras can be integrated for enhanced surveillance.
- Various sensors can be used for comprehensive coverage.
- Choose between wireless or wired components based on needs.
Expert Advice: Start small by implementing basic sensors and gradually expand your system as you gain confidence. Experiment with different configurations and remember to regularly update your programming for optimal performance.
Begin your Arduino home security project today by exploring tutorials and community forums for inspiration and guidance.
Leave a Reply